使用Reveal进行视图分析
Reveal比Xcode自带的Debug View Hierarchy要给力一些。好吧,这句话我收回-。- Xcode7中的视图调试貌似改进了很多,还支持debug。言归正传,说一下如何使用 Reveal 吧
官方有三种使用方法:
Static Linking
- Linking Reveal’s static library into your iOS application is the quickest and easiest way to enable Reveal introspection.
Dynamic Loading
- Dynamic loading allows third party libraries to be loaded into an iOS application on demand, at runtime. In this scenario the library is not linked in to the executable, but is instead included in the app bundle and can be loaded on demand. This approach allows developers to maintain full control over when the Reveal library is loaded, and when the service is started and stopped within their application.
- CocoaPods
- CocoaPods is a dependency management system for iOS and OSX projects. It automates the configuration of workspaces to manage 3rd party library dependencies in Xcode projects.
我们不希望使用一个三方工具,还要修改代码。所以我们重点关注第二个Dynamic Loading。
下面是我直译版本:
在不修改工程项目的情况加载 Reveal
这个方法只是适用于项目运行在模拟器上
加载Reveal不需要修改工程项目是一个极好的办法。方便让你分析iOS App,不用去考虑修改工程所带来的隐患了。
- 使用Xcode打开你的项目,选择 View(视图)->Navigators(导航)->Show Breakpoint Navigator(断点导航栏)
- 在底部栏的左边有一个加号,点击添加符号断点(Symbolic Breakpoint)

- 右键编辑断点 输入
UIApplicationMain到Symbol输入框中 - 点击
add action按钮,确认action设置为Debugger Command - 复制下面的语句到输入框中
expr (Class)NSClassFromString(@"IBARevealLoader") == nil ? (void *)dlopen("/Applications/Reveal.app/Contents/SharedSupport/iOS-Libraries/libReveal.dylib", 0x2) : ((void*)0)- 需要确认你的Reveal安装路径是否一致
- 检查
Automatically continue after evaluating actions.选项是否勾选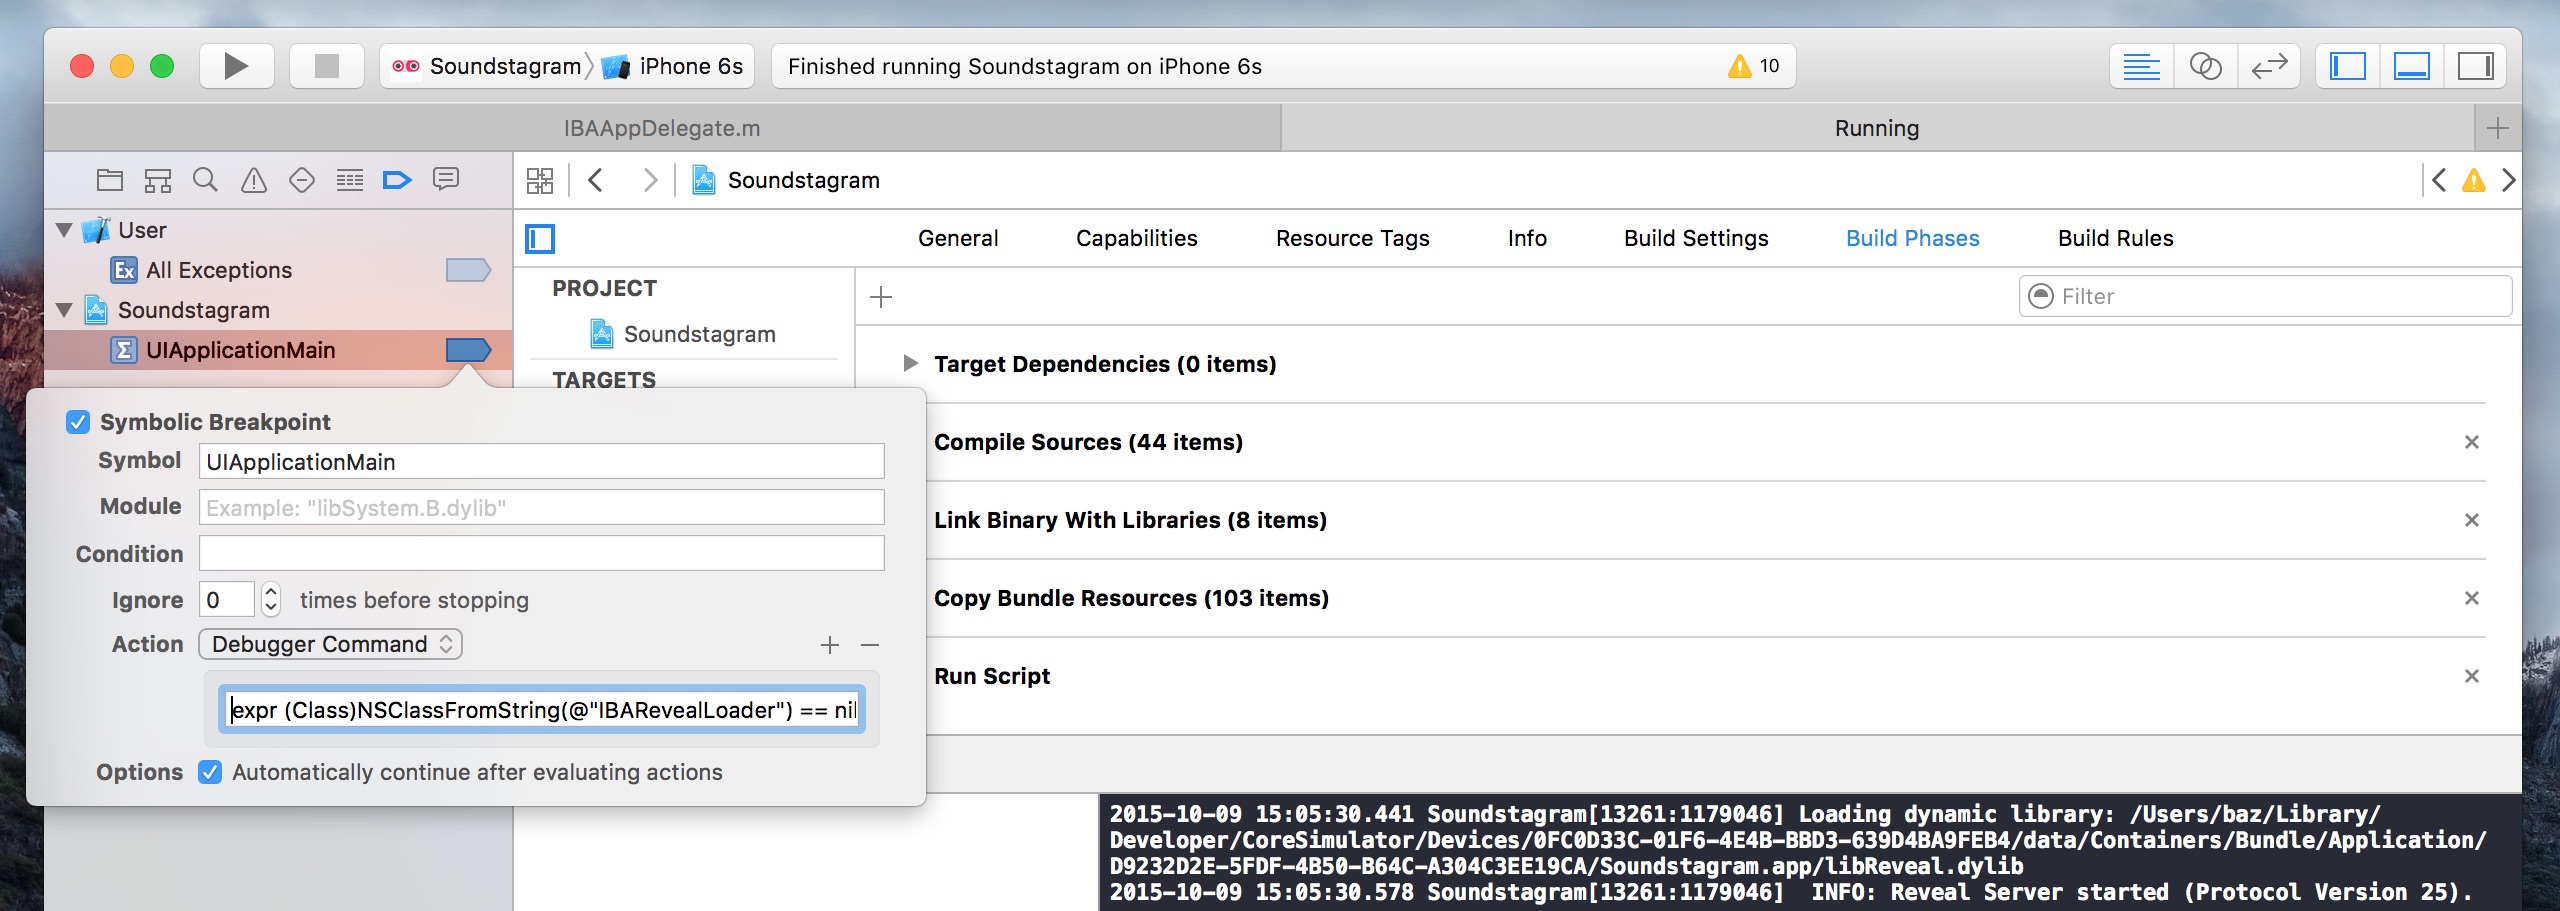
- 右键点击这个最新创建的断点选择
Move Breakpoint To->User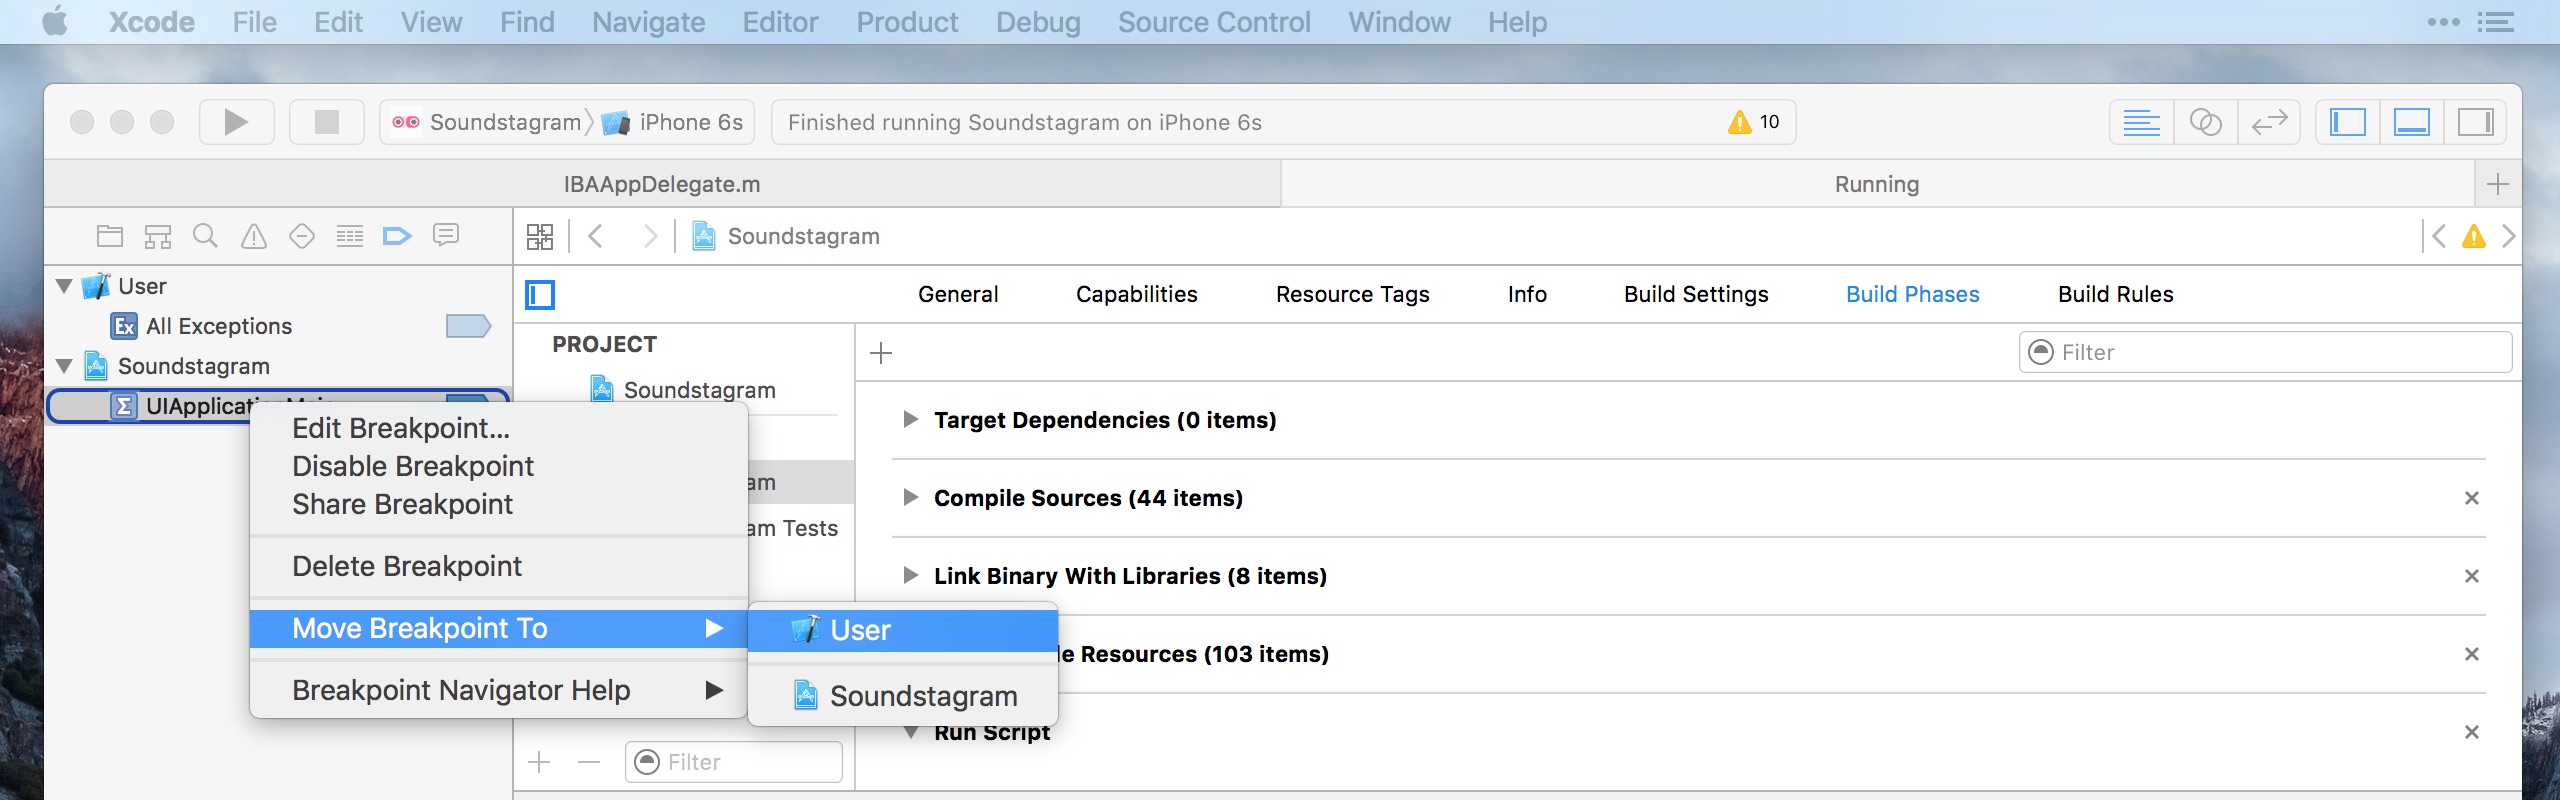
- 在Xcode编译并运行你的应用在iOS模拟器上。如果一切步骤设置ok的话,你在 Reveal 上切换选择你的App就可以愉快的开始